How to Clean and Change Roomba Filters
In this guide, find out how to clean and change Roomba filters. We will also share tips on how to clean bins, and the Roomba bag.
Roombas are great helpers at home as they can clean your home autonomously, but then, you need to change the Roomba filter from time to time.
There are different Roomba models, each with a different procedure for changing the filter and cleaning the bin.
In this article, we have shared tips on buying Roomba replacement filters, cleaning the bin, and, importantly, how to change the filters of the popular Roomba models. But just before that, let’s cover a few things regarding buying Roomba filter replacements.
Roomba Filter Replacement Buying Guide
Buying a Roomba replacement part, including a filter, is the biggest challenge in a market full of fake third-party replacement parts. It can also be hard to know which is the right filter for you. This section has shared some of the tips to help you get the right filter for your Roomba.
Buy Authentic Roomba Filters
There are many Roomba replacement parts on the market: some are genuine parts while others are knockoffs. As a buyer, you want to buy a genuine filter to ensure that your Roomba works optimally.
That said, we recommend buying original filters manufactured by iRobot. While they may be a little bit more expensive, they guarantee the best performance and durability. There are also a few other third-party brands that are cheaper but can guarantee better performance and durability.
Buy From Trusted Sellers
If you are not buying directly from iRobot, get your replacement filter from Amazon. The advantage of Amazon is subsidized prices, and there’s the guarantee that you are buying authentic products. The retailer vets all the sellers on the platforms.
What’s more? On Amazon, you can check the reviews of previous buyers so that you are not duped into buying fake Roomba filters just because they are cheap.
How to Clean and Change Roomba Filters
Now that you know the basics of buying Roomba filters let’s get into the details of cleaning Roomba bins and changing or replacing filters.
How to Clean Bin and Clean or Change Roomba 600 Filter
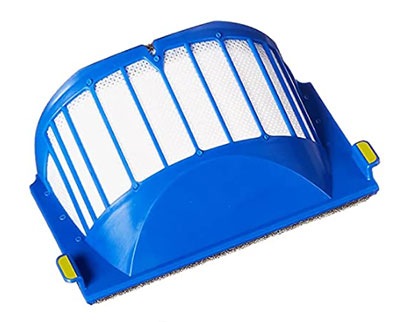
The Roomba 600 series includes the likes of Roomba 650, 675, 690, and 695.
Below are the steps for cleaning the bin, cleaning the filter, and putting it back.
- Step 1: Push the release button at the Roomba’s top and slide out the bin.
- Step 2: Press the yellow lever and open the bin.
- Step 3: Empty the bin contents (Don’t wash the bin in water, just wipe it, maybe with a dry cloth).
- Step 4: Press the yellow tabs on either side of the filter to slide it out.
- Step 5: Tap it in the trash can, clean it. (If it’s too dirty, wash the filter using water and make sure it dries before returning it)
- Step 6: Slide back the cleaned or replaced filter into the bin.
- Step 7: In the last step, insert the bin back into the Roomba.
How to Clean Bin and Clean or Change Roomba 800/900 Filter
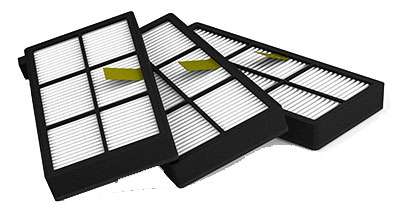
The Roomba 800 Series includes the Roomba 805, 850, 860, 870, 880, and 890. This maintenance guide also covers all the Roomba 900 Series models. They include Roomba 960, 965, 980, 981, and 985.
The maintenance of the Roomba 800 and 900 Series is similar.
Below are the steps for removing the bin, cleaning it, removing or replacing the filter, and putting everything back.
- Step 1: Press the bin release button and slide the bin to remove it.
- Step 2: Open the bin’s door and empty the contents. (Don’t wash the bin in water, just wipe it with a dry cloth, maybe).
- Step 3: To remove the filter, press and release the filter door release tab.
- Step 4: Grasp the filter’s yellow tab and pull it out.
- Step 5: Tap the filter in your trash can or wash it if necessary and let it dry.
- Step 6: Return the filter inside the bin, or replace it with a new one.
- Step 7: In the last step, slide the bin back into the Roomba.
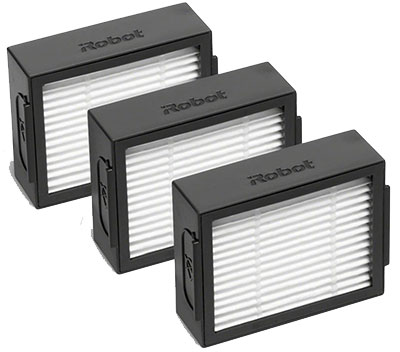
How to Clean Bin and Clean or Change Roomba I and E Series Filter
This guide covers the bin cleaning process and changing/replacing of the entire Roomba I and E Series. These models include Roomba i7/i7+, e5/e6, i3/i4, and i6/i8.
Now that the base models of these Roombas don’t have automatic self-emptying, we will divide this section into two.
Without further ado, here are the steps for removing the bin, emptying it, cleaning the filter, and putting it back.
- Step 1: Press the bin’s release button located on the side of the Roomba (It has a bin icon).
- Step 2: The bin will pop out.
- Step 3: Open the bin’s door, empty the contents, and wipe inside with a dry cloth. (Don’t wash the bin – it’s not dishwasher safe)
- Step 4: Then, hold the filter and pull it out.
- Step 5: Tap the filter in the trash can to remove dust and dirt and wash it if necessary.
- Step 6: Return the clean filter, or replace it with a new one.
- Step 7: Slide in the bin back inside its slot on the robot by placing the hook into the opening and ensuring it acts as a hinge.
In this section, we have listed the method for cleaning or replacing the filter only. As you may be aware, the ceiling models in the I and E series have automatic self-emptying, so they will empty their bins automatically. The ceiling models are Roomba i7+ (7550), i6+ (6550), i3+ (3550), and i8 (8550).
Below are the steps to follow when cleaning and changing the filter.
- Step 1: Remove the bin by pressing the tab on the Roomba’s side.
- Step 2: Detach the filter from the bin.
- Step 3: You can decide to wipe the bin with a cloth if necessary.
- Step 4: Tap the filter in the trash can to remove dust and dirt. Wash it if necessary and leave it to dry.
- Step 5: Return the clean filter, or replace it with a new one.
- Step 6: Slide in the bin back inside its slot on the robot by placing the hook into the opening and ensuring it acts as a hinge.
For the record, the only bin maintenance required of you is to remove the disposable bag from the iRobot CleanBase and replace it once it is full. Refer to the guide on how to change the Roomba bag below.
How to Clean Bin and Clean or Change Roomba S9/S9+ Filter
This guide covers the maintenance of the two Roomba S9 vacuums: Roomba S9 (9150) and S9+ (9550).
Below are the steps to follow when cleaning and changing the Roomba S9 filter.
- Step 1: Lift the Roomba’s lid by pressing the plastic hook located under the lid.
- Step 2: Lift the filter box handle and pull the bin out.
- Step 3: Lift the tab and open the lid.
- Step 4: Pull out the filter by lifting it from the sides.
- Step 5: Tap the filter in the trash can. The Roomba S9 filter can also be washed.
- Step 6: Return the clean filter or replace it with another new filter.
How to Replace Roomba Bag
Once you see a red LED on the Clean Base unit, on any I or S series robot vacuum, it’s time to replace the bag.
The Roomba replaceable bags are compatible with I and S series Clean Base® Automatic Dirt Disposal units.
Check out the Roomba bag replacement guide below. It works for all the Roomba i and S series vacuums with the automatic Clean Base unit.
- Step 1: Open the canister’s lid by lifting the lid.
- Step 2: Pull up the entire bag out of the canister by holding the plastic card that leads to the vacuum port.
The bag has been designed to seal automatically, so even if you have allergies, you won’t be affected by the dirt.
- Step 3: Dispose of the used bag.
- Step 4: Replace a new bag by sliding the plastic card between the guard rails.
If you still have the red LED on after replacing the bag, it means the bag has not been inserted correctly.
Frequently Asked Questions
1. How Often Should You Clean Your Roomba’s Bin?

2. How Often Should You Clean Roomba Filter?
3. How Often Should You Change Roomba Filter?
4. Can you wash Roomba filters?
Wrapping Up
There you have it, folks, the ultimate guide on how to clean and change Roomba filters. While many Roomba owners focus on just emptying the bin, it’s important to clean and change the filter for the Roomba to work at peak performance.


Linda Love
I’m still trying to figure out why my I7 sell emptying Rumbs doesn’t empty anymore. A little upsetting. Used to Mott every time it returned to base. Not any more. Removal tube not plugged.